Plugin Details

Our Refund Policy
We guarantee 100% satisfaction with our help & support service. However, if our plugin still doesn’t meet your needs, we’ll happily refund 100% of your money within 30 days of your purchase. No questions will be asked.
Gravity Forms Integration with Zoho CRM
The integration of Gravity Forms with Zoho CRM is the perfect solution for businesses who manage their sales and marketing data in one central location. Keep your data in sync while also improving your conversion rates and closing more deals. The integration between Gravity Forms and Zoho CRM will enable users to synchronize their form submissions from Gravity Forms to their Zoho CRM account. It will also be possible for them to manage these forms by viewing the data collected through the form submissions in one place. It is definitely needed as there are many businesses who use both Gravity Forms and Zoho CRMs for their sales and marketing data management.
If you are looking to enhance your business operations using our form and WooCommerce plugin integrations, you can explore our combo packs section, which offers a variety of options.
Our Refund Policy
We guarantee 100% satisfaction with our help & support service. However, if our plugin still doesn’t meet your needs, we’ll happily refund 100% of your money within 30 days of your purchase. No questions will be asked.
Zoho CRM Integration With Gravity Forms
A Step-by-Step Tutorial
OverView
Connect your Zoho CRM account and Gravity Forms
- Go to Integration of Zoho CRM and Gravity Forms plugin from WordPress
- Select form created by Gravity Forms from which you want to send data in Zoho CRM
- Then go to Zoho CRM authorization page
- For Client id & Client Secret click on Zoho API console.
- Select “Server Side Applications”
- Give a client name but It cannot contain keyword “Zoho”
- Copy “Homepage URL” and “Authorized Redirect URIs” from the plugin
- It will generate “Client ID” and “Client Secret”, paste it in the plugin
- Now complete the authorization process
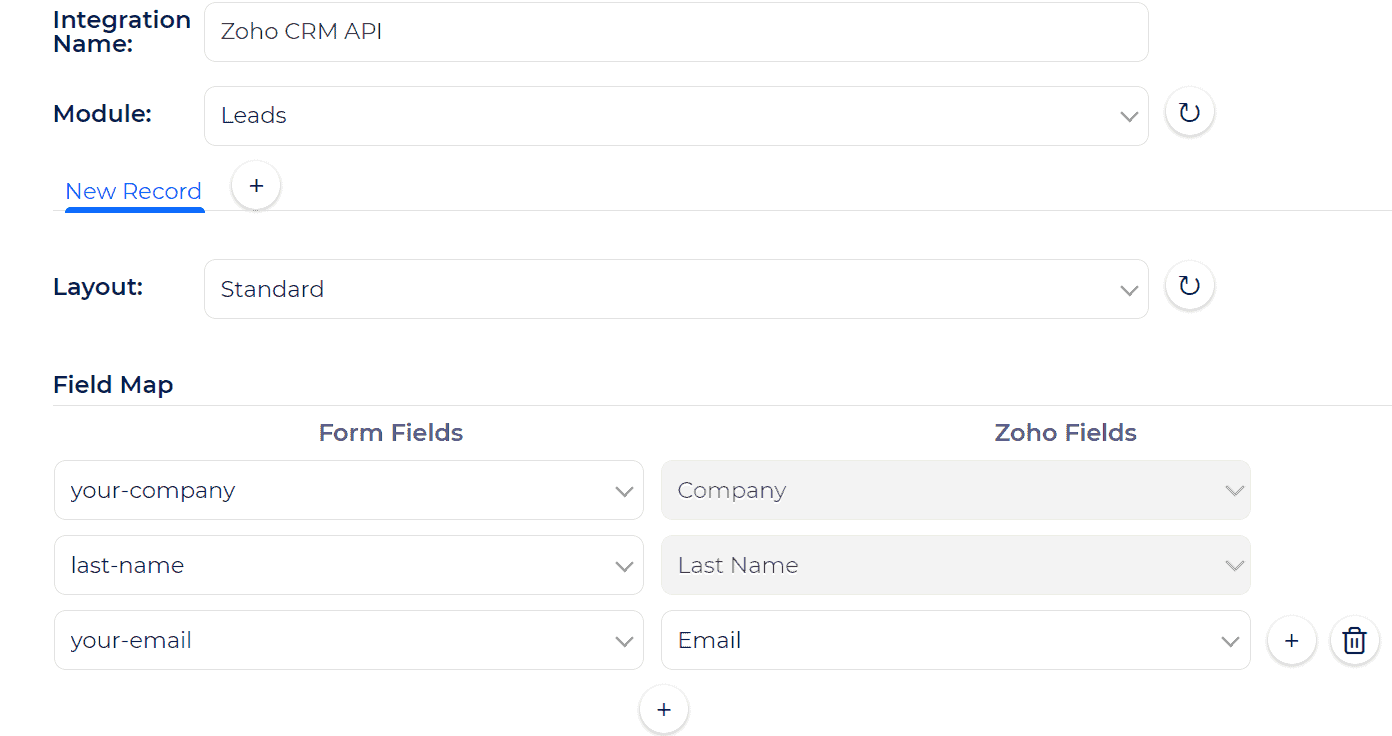
Module and Layout
[Note :Users can select all the modules & layouts for the pro version.]
Fields Mapping
To synchronize with the Zoho CRM interface with Gravity form, mapping is a mandatory feature. Mapping all the Gravity Forms fields with the related Zoho CRM fields makes sure that all the form submission data will be shown perfectly on your CRM account. Apart from mapping all the necessary fields, users can send custom value to any Zoho CRM fields if they want.
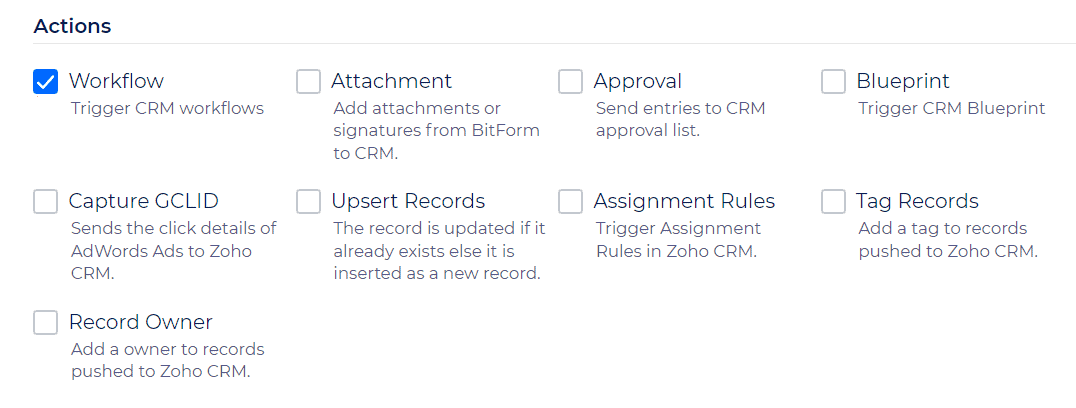
- Workflow : Select this option to trigger the Zoho CRM workflow to relevant the selected module. If you didn’t select this option Zoho CRM workflow to relevant the selected module doesn’t work.
- Attachment : To Select this option you can send file upload field data to Zoho CRM related list Attachments. You can also send file upload field data to Zoho CRM via normal field mapping. Please select the CRM file upload field from the drop-down which you want to send data.
- Approval list : To Select this option you can send file upload field data to Zoho CRM related list Attachments. You can also send file upload field data to Zoho CRM via normal field mapping. Please select the CRM file upload field from the drop-down which you want to send data.
- BluePrint : Select this option to trigger the Zoho CRM blueprint to relevant the selected module. If you didn’t select this option Zoho CRM blueprint to relevant the selected module doesn’t work.
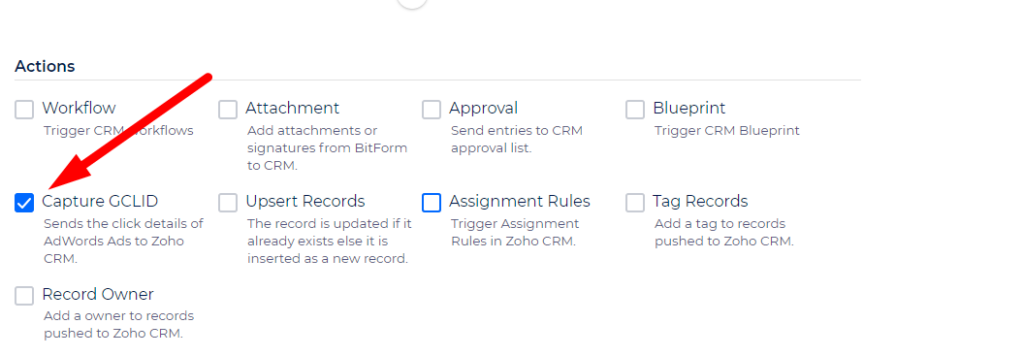
- GCLID : Sends the click id of Google ads to Zoho CRM.
1. Edit the Form
2. Add an HTML Field to Your Form
3. Inside the HTML field you added in step 2, insert the following HTML code. This code creates a hidden field to store the GCLID value.
<input type='hidden' id="zc_gad" name="zc_gad" value=""/>
4. After adding the hidden field, save or update the page to apply the changes to your Gravity Forms.
5. Insert the following tracking code just before the closing </body> tag. This code loads the tracking script:
<script type="text/javascript" src='https://crm.zoho.com/crm/javascript/zcga.js'></script>
6. Now, you need to enable the Capture GCLID option from your Integration. This step is crucial for capturing GCLID values and sending them to Zoho CRM.

7. With these changes in place, your Integration will now be capable of capturing GCLID values and sending them to Zoho CRM when users click on your Google ads and submit forms. This helps in tracking conversions and attributing them to specific ad clicks.
- Upsert Record : If you choose the YES option, any record with the same value in Zoho CRM will be updated with the new information. On the other hand, selecting NO will create a new record in Zoho CRM. Additionally, you have the ability to arrange the fields in the order that the upsert process should occur.
Here’s how upsert works:
For example, you arrange the Email field before the Company field. When a form is submitted with the Company as Bitcode and Email as [email protected].
a. First, it’s checked if the email [email protected] exists in the CRM. If it does, then the mapped fields get updated to the record associated with that email address.
b. In case of the email address [email protected] doesn’t exist in your CRM, it’s checked if Bitcode exists under Company. If it does, then the mapped fields get updated to the record associated with that company name.
c. If none of the field values exists, then a new record with all the mapped details is created under the mapped CRM module - Assignment Rule : When you choose this option, Assignment Rules defined in Zoho CRM can be triggered when form entries are added to a CRM module. Please select the assignment rule from the drop-down which you want to trigger.
- Tag records : When you choose this option, you can add a tag to the records that are pushed to Zoho CRM. It helps you to search for records in CRM by tag. There has a list of tag records in the dropdown. You can use Zoho CRM by default tag, form fields also can add a custom tag.
- Record owner : Select this option and you can set a record owner of the sent record.
Timeline/Log
Here you can see the API response from Zoho CRM after Gravity forms is submitted. You will get a response whether the submission is successful or failed. It will help you to debug the situation.


